FBX Import
Lensmaster is able to import an FBX animation including all the 3D models and targets involved into an LMA animation that can be used in Lensmaster.
How to import an FBX animation into Lensmaster?
Select the FBX file you wish to import.

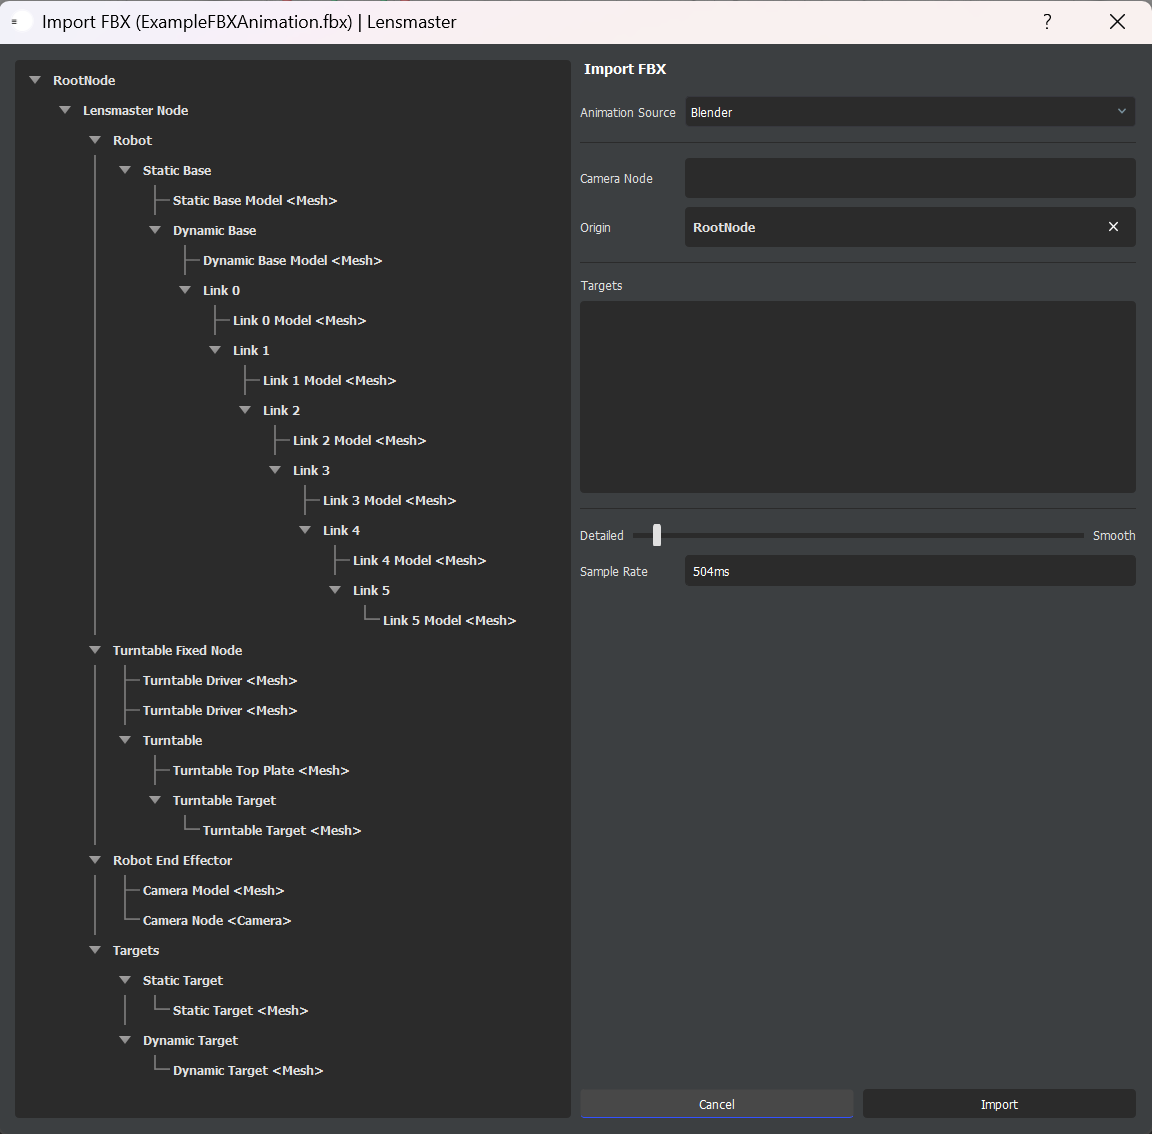
After selecting the FBX animation you wish to import, an FBX Import Window will appear as shown above. On the left side of the window, you will see a tree representing all the elements of your FBX animation. On the right side of the window, you will be required to fill the fields as described in the steps below.
Navigating the FBX Import Window
Select the software that was used to create the animation.
Select your Camera Node. This is the primary node representing the imported animation. Typically, you can select the Root Node as the Camera Node, meaning all transformations and animations will be imported relative to this node.
Select your Origin Node. This is an optional reference node that allows you to transform the imported animation relative to a different frame of reference. When selected, all imported animation data is adjusted so that it is expressed in the coordinate space of the origin node. This is useful when you want to re-frame the animation within your own scene’s structure.
Select your targets. You can select any 3D object to be imported as a target.
Set your sample rate. This can be done either by dragging the slider or by manually typing in the sample rate value.
Click Import to finish importing your FBX animation into Lensmaster.
Note: To set the nodes in the relevant fields, you can either select the field to put it in focus then select the node from the tree, or you can simply drag and drop nodes from the tree to the relevant fields.