Robot Status and Operating Mode
This section covers the robot's various robot statuses and operating modes.
Robot status toolbar overview

Item | Description |
|---|---|
Calling the main menu. | |
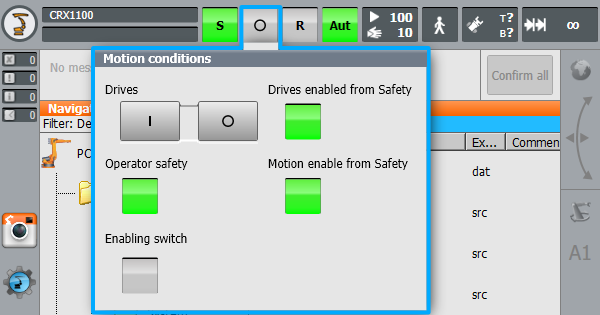
Drive indicators, they indicate if the drives are enabled or not. | |
Program status indicator. | |
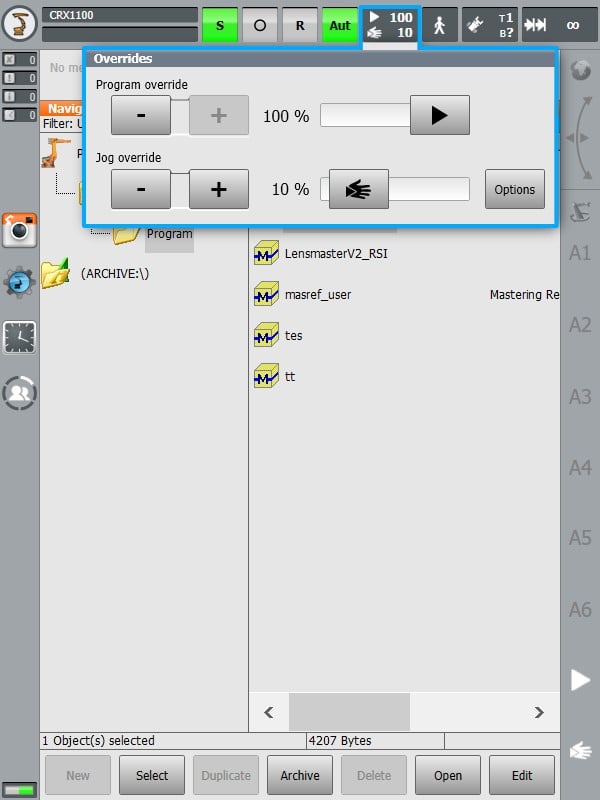
Override speed keys. | |
Determines how the camera is being attached to the robot. |
Robot drives
The robot drives are the motors used for moving the robot links in sync towards a desired position. Each of the six links has its own motor.
Statuses | Description |
|---|---|
The drives are off. | |
The drives are on but the enabling switch has not been pressed. | |
The enabling switch has been pressed. |
Enable drives
Select the
 icon.
icon.
Press on the
 icon to switch ON the drives.
Press on the
 icon to switch OFF the drives.
Once the robot drives indicator turns green, the drives have been turned on.
Program status indicator
Statuses | Description |
|---|---|
No program is selected. | |
The program has been selected. | |
The program is selected and is being executed. | |
The selected and started program has been stopped by . | |
The program is done executing. |
Once a program has been selected, and an operating mode has been chosen, the
 icon will turn yellow.
Once the selected program is being executed, the
 icon turns green.
If the program is stopped whilst running , using the stop key, then the
 will turn red.For more info about where to find the stop key, refer to SmartPad Overview.
Resetting or canceling a program
How to reset a program
Click on the program status indicator.

Press the reset button.
Once the program has been reset, the program status icon will turn yellow.
How to cancel a program
Click on the program status indicator.
Press the cancel button.
Once a program has been canceled, the program status icon will turn grey again.
Robot Operating Modes
Operating Mode | Use |
|---|---|
T1 | For test operation,programming and teaching. |
T2 | For test operation. |
AUT | For manual jogging at a full range of velocities. |
AUT EXT | For industrial robots with higher-level controllers. |
Changing operating modes
Turn the key switch clockwise.
For manual jogging, set the Operating mode to T1.
Once the operating mode has been selected, turn the key switch back to its original position.
Speed and program override
Speed and program overrides are tools that help adjust the velocity at which the robot is operating.
Program Override | Jog Override |
|---|---|
Program override is the velocity of the robot during program execution. | Jog override determines the velocity of the robot during jogging. |
The program override is specified as a percentage of the programmed maximum velocity. | The velocity is set based on percentage, 100% being the maximum velocity reached during jogging. |
Setting the program override
Select the override speed keys.

For setting the speed at which the selected program will be executed, go to the Program override and press the + or - keys to set the desired speed.
To change the program override, the slider can also be used to adjust the program execution speed.
Setting the jog override
For setting the speed at which the robot manual jogging will be executed, go to the jog override and press the + or - keys to set the desired speed.
To change the jog override, the slider can also be used to adjust the jogging speed.


