Kuka Robot Tool Load Configuration
This article will guide you through setting up the tool load on a KRC4/KRC5 family Kuka Robot.
Adding a new Tool Configuration
Grab your Kuka SmartPad
Make sure that no program is selected.
Change the user to Administrator or Expert.
On the SmartPad, navigate to .
Hit Add at the bottom of the page to add a new tool.
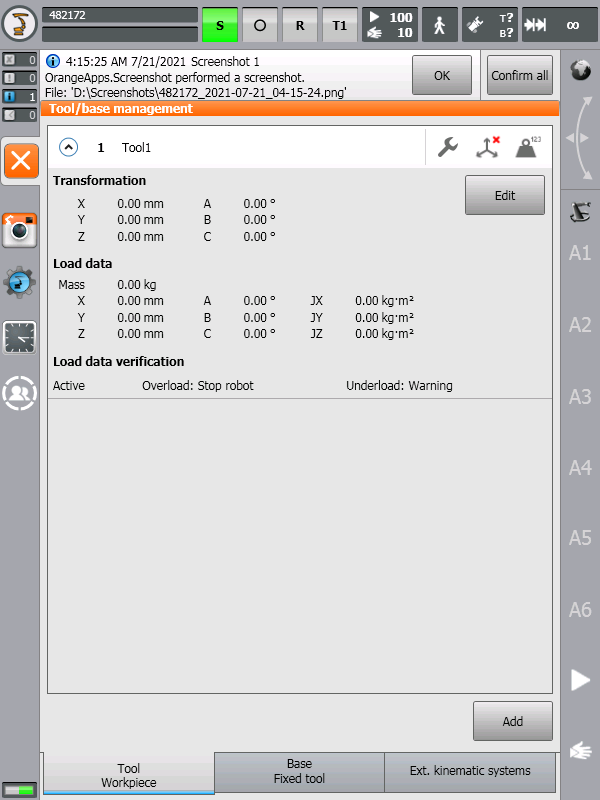
Hit Edit to configure the newly added tool.
Give your tool a name for easy referencing.
Setting the Tool to Load Data
Manually
Navigate to
Select the tool you want to set the payload data of and hit edit.
Under Load Data, set the Mass to a value close to that of your camera package
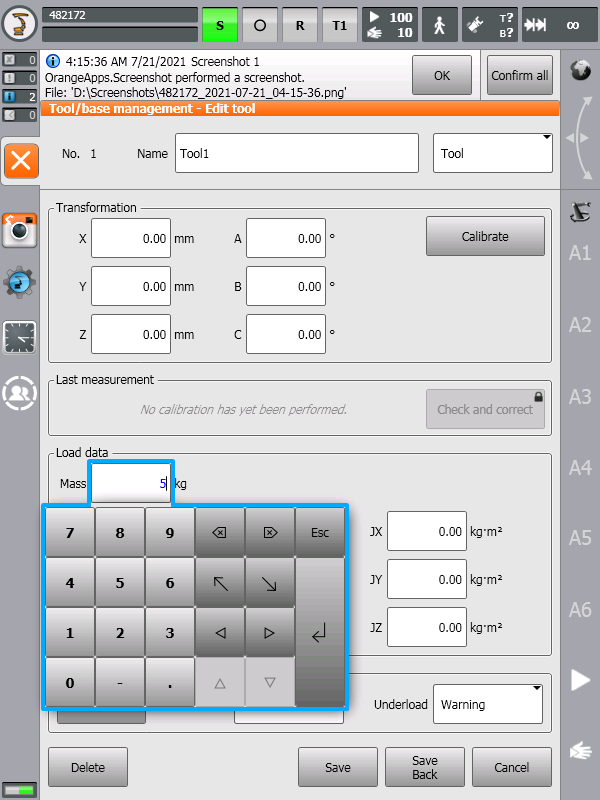
Hit Save to apply the settings.
Using Load Data Determination
Using Lensmaster joint controls, manually jog the robot into the following positions.
Axis
A1
A2
A3
A4
A5
A6
Position
0°
-90°
90°
0°
0°
0°
On the SmartPad, Navigate to
Select the tool you want to set the payload data of and hit edit.
Under Load Data, hit the Determine button to start Load Data Determination.
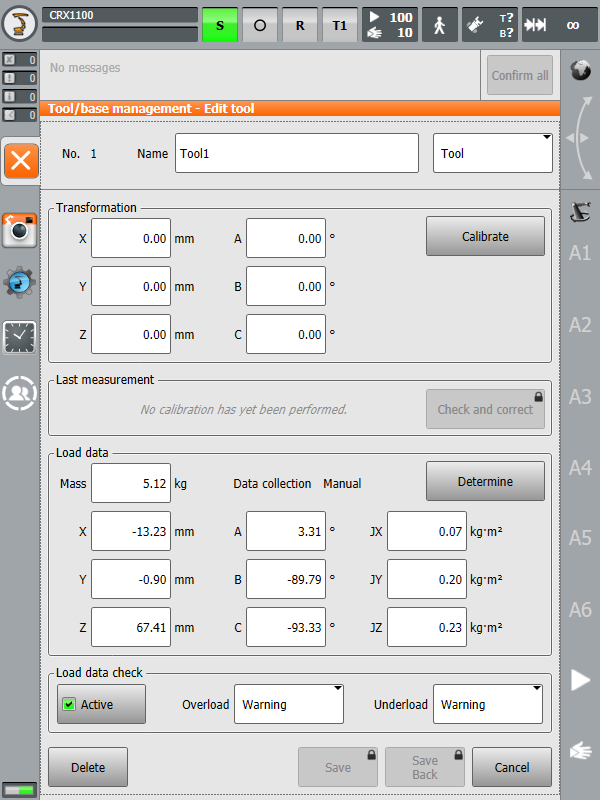
The Load Data Determination UI should come up.
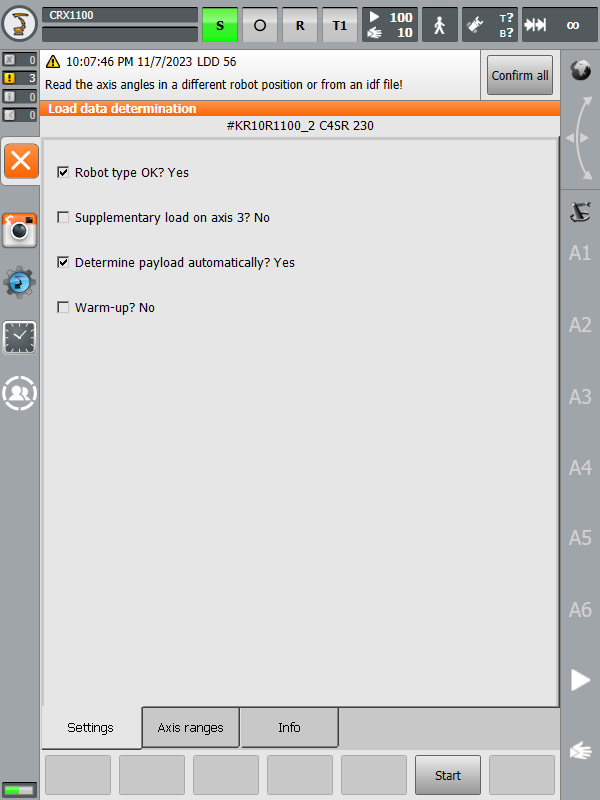
Navigate to the tab.
If any of the axis rows is highlighted in red, you need to jog the robot into another starting position before running Load Data Determination.
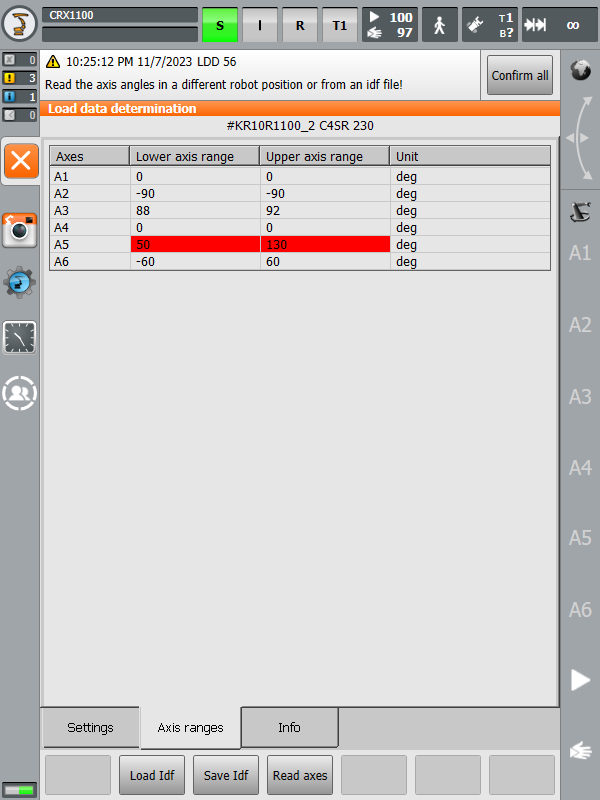
To do this:
Set the robot to T1 mode.
Manually jog the axis highlighted in red towards the center of its range of motion.
Hit Read axes to load the new robot axis positions.
Return to the tab.
Set your robot to AUT or T2 mode.
Hit Start to run Load Data Determination.
After Load Data Determination is complete, hit save to apply the new load data to your tool.
Selecting your active tool
Open the tool/base menu on the top right of your pendant.
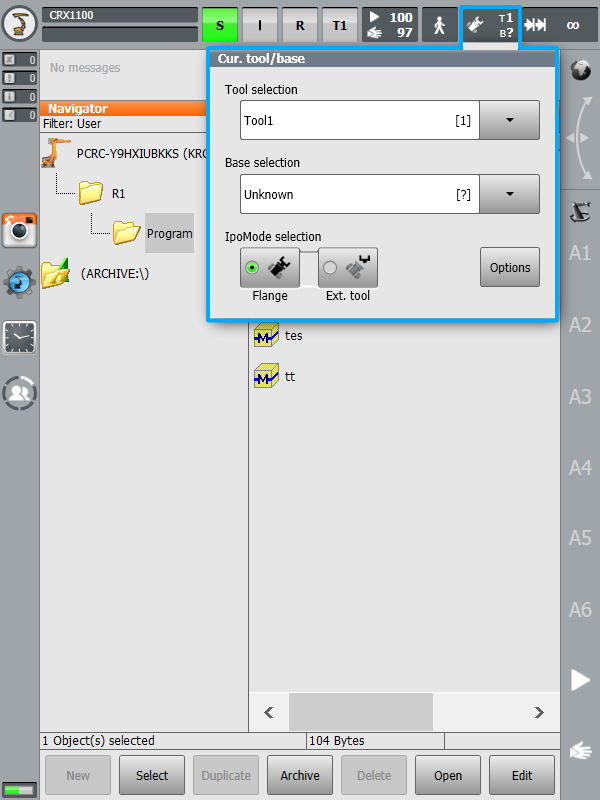
Clock on the Tool selection dropdown and select the tool you want to activate from the list.
Dismiss the tool/base menu by taping anywhere on screen.